I put this guide together for one simple reason – I’d love to have had something like it when I first got the UppaBaby car seat.
I found that information on correctly installing the Mesa is sprinkled all over the place…the UPPAbaby website, Youtube videos, blog posts…it’s frustrating if you’re a new owner of the seat.
What’s missing is a one-stop-shop hub for the information. So I’ve compiled one that covers it all.
If you’re a new Mesa owner, bookmark this and thank me later.
If you’re just looking into UPPAbaby Mesa, stick around because I’ll cover some of the intricacies you definitely need to know before buying it.
What we’ll go over:
- Install of the base to the car seat – using either the LATCH system or the vehicle belt
- Install of the Mesa carrier onto the base
- Install of the carrier-only (using the car seat without the base) – I have a grievance here that I’d like to share
Did I mention you should bookmark this?
Ah, yes…I did…
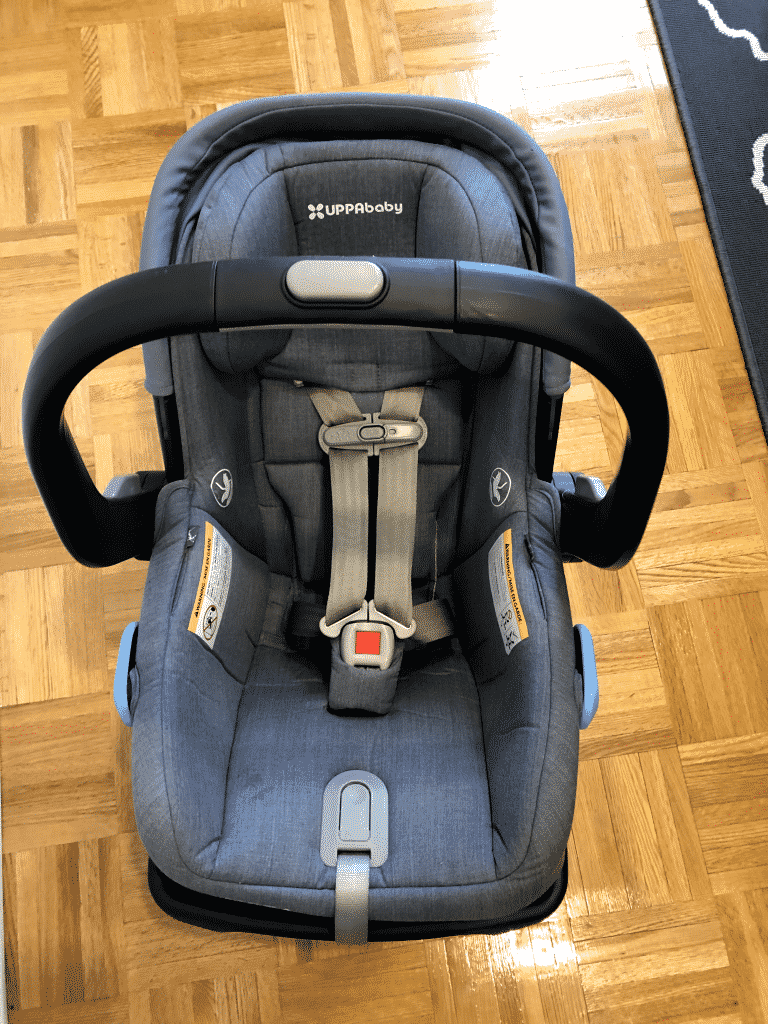
Install of the UPPababy Mesa base
You have two options to install the base to the car seat – the LATCH and the seat belt.

I’ve used both, and I much prefer using the LATCH. It looks cleaner, feels more secure, and you won’t have to adjust it as often as you would with the seat belt install.
Checking if the install is correct is the same for both options (more on that in a minute).
First things first – where to install the UPPAbaby Mesa
If at all possible, install the infant car seat in the middle of the rear vehicle bench.
I’ll explain why I say “if at all possible” in a minute…
The reason for the middle install is safety. There’s now an undeniable body of studies proving that the middle position is the safest place for an infant car seat – like this study from the University of Pennsylvania (via WebMD).
I said I was at all possible because most cars don’t have middle LATCH anchors. I found a great resource for checking if there’s center LATCH in the 2nd or 3rd row here.
Moving on…
Installing the base using the LATCH system
Any good LATCH system will feel basic and simple, and that’s the case with the Mesa, too.
Before installing the Mesa, you need to know the location of the LATCH anchors in your car.
In most cars, the anchors will be on the outer rear seats.
If you can’t find them, look up the location in your vehicle owner manual or online.
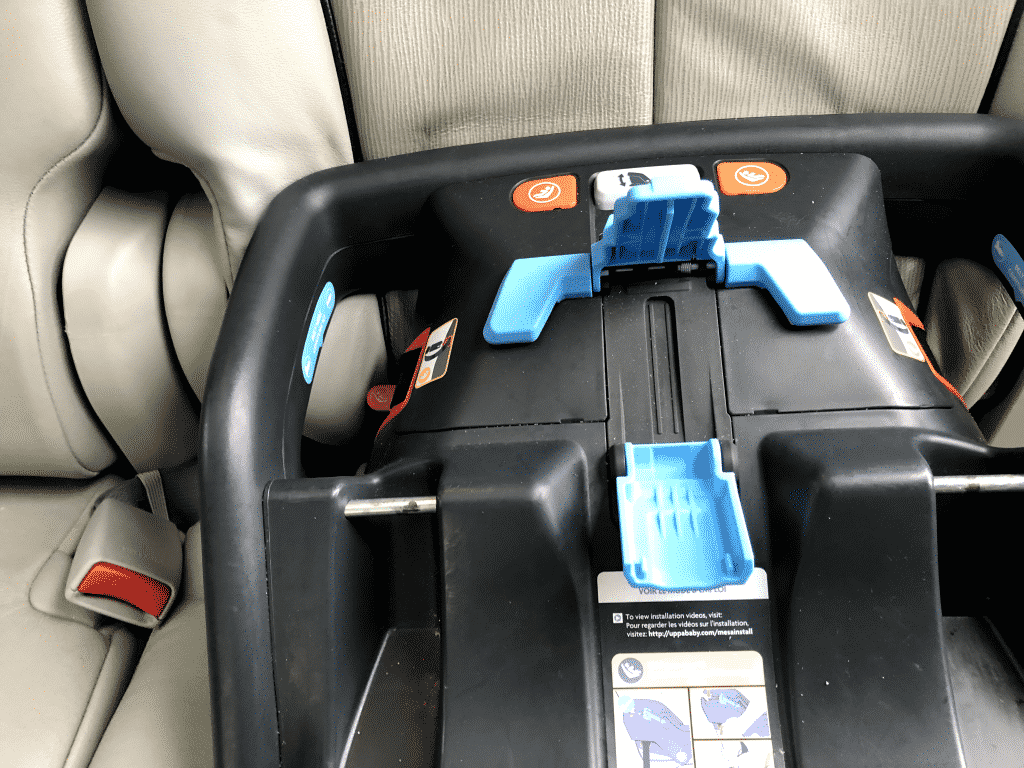
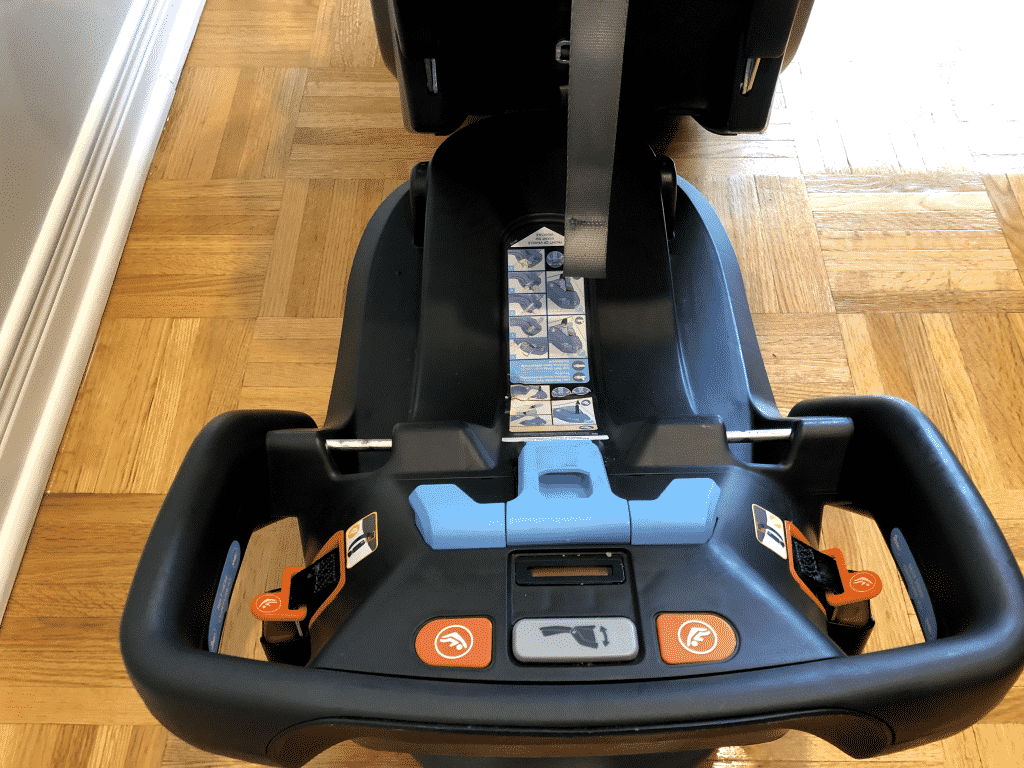
Here are the steps to install the UppaBaby Mesa base with the LATCH:
- Locate the anchor points in the back seat
- Place the base onto the seat in a rear-facing position (the orange button and the belt lock-off should be closer to the seat)
- Press the middle (gray) button and adjust the foot of the base to be level – you know it’s correct once the level indicators on the side of the seat only show green.
- Press the orange button to release the strap. Pull gently and click them into the vehicle anchors (make sure they’re not twisted)
- Do the same on the other side.
To ensure the tightness is right, gently push the top of the base into the seat until the indicator between the button turns green (you might need to wiggle it a bit).
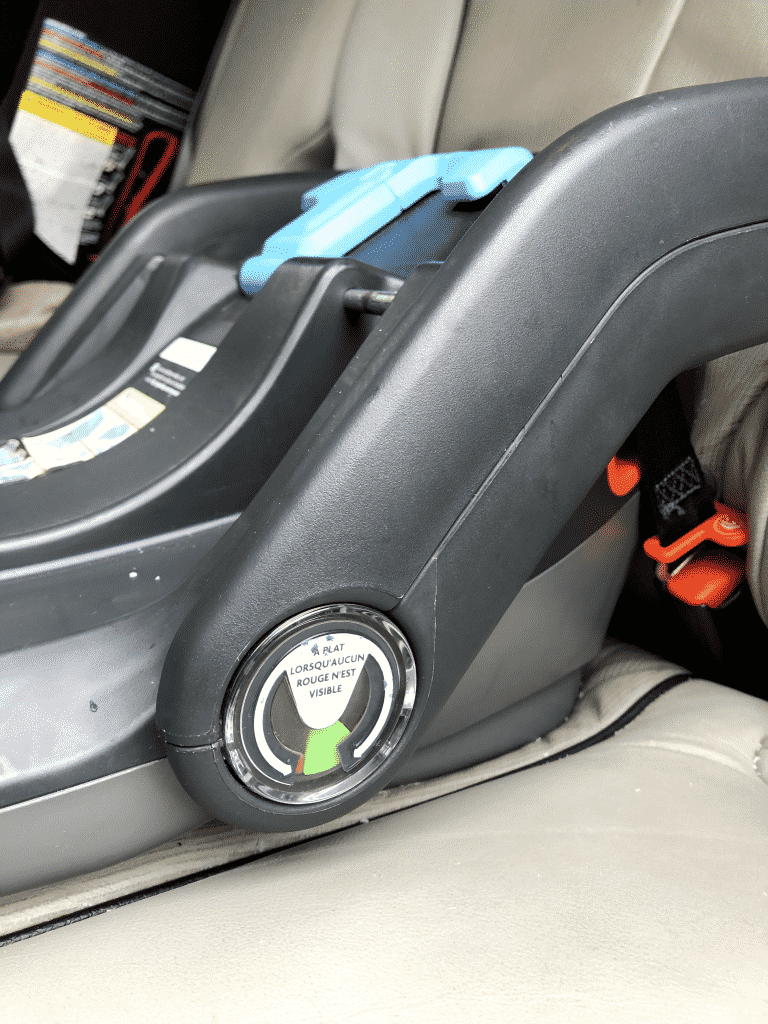
Install the Mesa base using the vehicle belt
Install of the base using the seat belt is very similar because you level the seat in the same way – the only difference is how you secure it.
To install the UppaBaby Mesa base using the seat belt, follow these steps:
- Adjust the foot so that only green is visible on the level indicators
- Open the blue belt lock-off buckle
- Slide the seat belt out and thread it through the belt path (handle-like raise plastic parts)
- Guide the seat belt under the lock-off and through the other side of the belt path
- Buckle the seat belt in
- Pull the belt and just it so there’s no slack
- Close the blue lock-off
- If the tightness indicator isn’t green, press/wiggle the base gently until the indicator is green
To check if the install is correct, try to move the base – it should be tight and not move more than an inch. That goes for both the seat belt and the LATCH method.
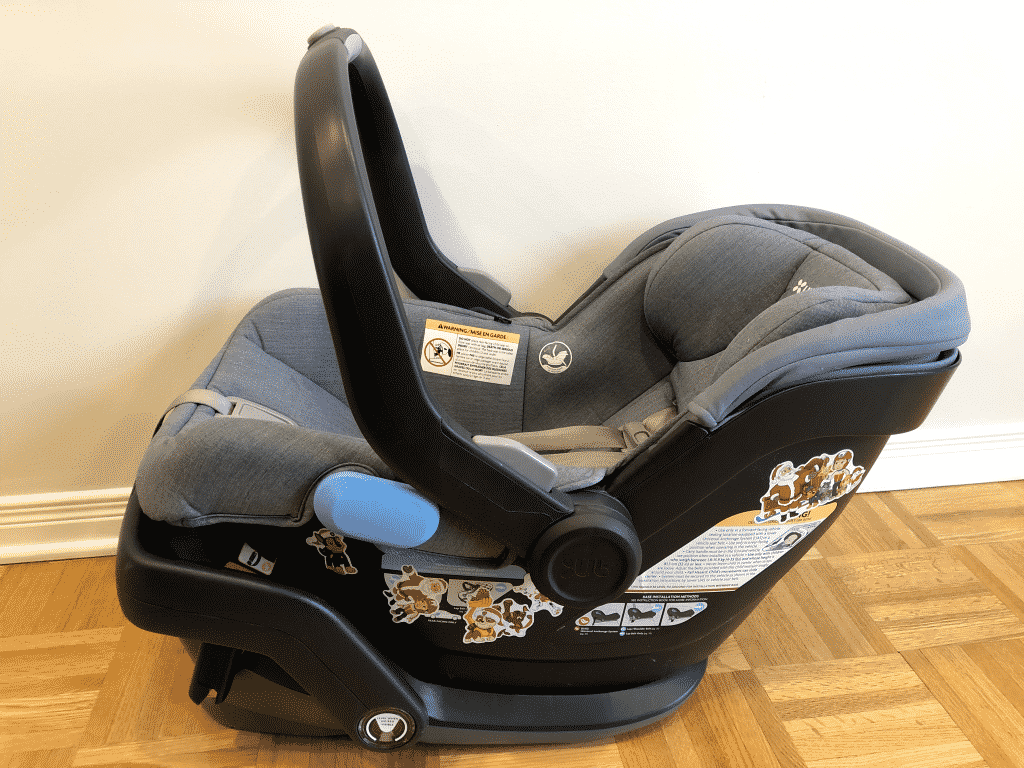
Install of the Mesa carrier onto the base
This section doesn’t deserve a step-by-step because it’s intuitive, and the Mesa clicks into place seamlessly.
Taking the Mesa carrier off the base only takes a second. You just press the carry handle and pull the Mesa carrier up.

For the dynamic parent, the convenience of the carry handle gives Mesa a significant edge over the competition.
Installing the Mesa without the base
Perhaps “install” is not the right word here.
Using the Mesa without the base is very simple because it’s all color-coded – any light blue parts are to be used with the vehicle seat belt. We’ve seen that with the lock-off.
To secure the Mesa without the base, follow these steps:
- Using the carry handle, gently place the carrier on the car seat and look for the red line (located on the side of the Mesa)
- Adjust the carrier until the red leveling line is parallel to the ground/floor of the car
- Pull out the seat belt and run it through the blue guiding hooks (located on the sides)
- Lock the seat belt into place
- While holding the belt tightly over the baby seat, release the other end of the seat belt let it lock into place.
- Check if the fit is tight (give it a little shake test)
My grievance – I mentioned that I have a grievance about installing Mesa without the base.
In older models of the Mesa, parents had the option to choose between securing the carrier through the European path (seat belt goes over and around the back) or the American (belt goes only over).
There’s nothing wrong with the American path; I just feel the European path gives the parent more confidence.
Final thoughts on the Mesa install
Apart from being safe and comfy, Mesa is one of the most user-friendly seats out there. I have zero doubts about that.
Once you go through the installs a few times, you’ll wonder what the big deal was.
I hope you found this guide helpful.
Paulo is a passionate dad who founded Wumblers to share his parenting journey with other new parents. He graduated from Concordia University and worked as a test engineer for over a decade. Paulo loves dad jokes and craft beer.
Learn more about Paulo and Wumblers here.