Proper car seat strap placement is very necessary to ensure the safety of your child in the car.
But is there any science in it – which you are unaware of?
You will be surprised to know that most of the accidents happen due to improper car seat strap placements or improper seating of children on the seat.
You cannot ride without a kid’s car seat – as the US law prohibits you to do so – but there is no law on strap placements and child’s appropriate position on the seat! This is where the things go wrong.
Most of the parents just put their kids on the seat – strap them and they are done. And if they meet with accidents they blame the seat and claim insurance.
Remember that the seat might be replaced several times, but the damage done on your kid is irreversible. Some scars and bad memories remain life-long.
Among the three of the most common issues that put children at risk is – improper use or installation of safety seats.
There are some many important things you need to look for before and after you seat your child in any vehicle. And all the steps mentioned here affect the strap position.
Things you need to look for BEFORE you seat your child
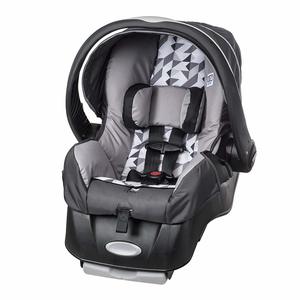
Car Seat Type
Car seats come in several specialized forms such as infant-only seats, convertible seats, forward-facing seats/restraints or belt-positioning booster seats. All these seats slightly differ from each other especially there are differences in the appropriate strap positioning mechanism
In special circumstances you child might need a different kind of seat from the above mentioned ones.
The right person to consult about the appropriate seat for your kid is the pediatrician. After looking at the anatomy of your child – he will suggest the best one. So visiting the pediatrician before you buy a seat is always advisable.
Place the seat in the middle
The safest place in any collision or crash is the middle seat in any row. If you have a big car – like a SUV having three rows then place the seat in the middle of the second row.
If you have a mini vehicle, having two rows of seats, then place it in the middle of the back row.
And if the car has just two seats in the front, then you are left with no option – but to place it in the first row. If you are placing it in the first row, then make sure that it is not directly adjacent to an airbag. Airbags can kill young children riding in the front seat. Never place a rear-facing car seat in front of an airbag.
Proper Installation of the Car Seat
The basic concept of a safety car seat for kids is lack of movement if a crash happens. For this – very importantly the seat must be fixed in all its grooves and hinges. Remember this is an external seat – and not one which comes like other seats comes manufactured which are properly fit. If this seat is not properly installed – then it can cause more harm than safety.
There should be less than 1″ movement side to side, and front to back when grasping at the belt path – where the seat belt gets connected to the seat belt.
This is the only place this minimum gap can be entertained. Other than that the seat should be fixed like a stone.
Weigh the seat down with all your force as you adjust the fasteners. Weighing the seat down allows you to get a tighter fit for the car seat.
Harness Straps
A five-point harness is a kind of form of seat belt which is fixed to a car’s frame via tethers or hinges. The belt consists of five straps – two over shoulders, two across the hips and one across the crotch area. All the five straps connect to a buckle release mechanism.
In any car seat, especially the kid’s safety seat a five point harness is mandatory. It secures ultimate protection by binding the body from all the positions. It holds the body tight and buckled up, so that accidents and crashes do not force the body out of the seat.
Mostly this harness is used in a kid’s safety seat – but before buying the seat – make sure that it is no less.
For protection against crashes every passenger in a moving vehicle must use some form of harness for protection. A seat belt is also a type of harness. Booster seats used for grown up kids does not necessarily require a five point harness and commonly uses an ordinary seat belt harness mechanism.
Is the tether attached?
Make sure a tether is anchored in your car – when your kids are very small, especially when kids are forward facing in the seat. If there is no tether or the seat needs to reconfigure because of the tether – do so, because it hold value when the kids are still small.
The main function of the tether is to further reduce any kind of seats movement. A small child is not able to control his or her head and neck movements – and statistics suggest that a tether can reduce forward movement of a child’s head and neck up to 6″ – which is very vital in a crash.
Get the seat inspected
After completing the overall installation of the seat – try to get it inspected by a car seat professional. A trained technician is a one who has completed a standardized AAA-certified course. You can find them at local Inspection stations frequently located at automobile stores, police stations or any other public place. These inspections are generally free.
You can find a trained car seat inspector by calling 1-866-SEAT-CHECK. “The National Highway Traffic Safety Administration” web site also has information – you check the details online there.
Head Protective Gear
A head protective gear or helmet is not necessary equipment along with a child’s safety seat, but it is recommended to carry it in vehicles.
A five point harness protects most of the body keeping it buckled up against injuries. The only downside to this seat belt mechanism is the insecurity of the seated person’s head.
A helmet comes to rescue on bumpy and uneven surfaces. When you are out for hiking and adventure outings – or where the chances of head crashing against the roof of the car increases, on these terrains at least a kid should not be left without head protection.
The age of your kid
There are two positions which you need to change according to your child’s age.
Initially – until the age of two your kids should be rear facing.
As he grows then – until the age of 4 he should be placed forward facing.
A five point harness is required in both the seating positions – Rear and Forward. And the way you place the straps will be different in both the positions.
After 10 your kid can use a booster seat.
Size and Weight of your kid
Before you place the kid – check the seats manual where the maximum height and weight the seat can accommodate is mentioned. Sometimes this information is also mentioned below the seat.
If your kid is over or under weight or has height differences than the strap can never be properly positioned. And you need to fix the issue by getting an appropriate seat.
Expiration of the car seat
It might sound weird but car seats do expire! Different manufacturers provide different expiry dates for their car seats mentioned in the manuals or below the seats. Generally car seats expire in a minimum of 4 years and a maximum of 12 years from the manufactured date.
You need to be aware of this! Check the expiry date before-hand especially if you have acquired a seat from Medicaid or you are using a second hand car-seat.
Do not use an expired car seat. Because after expiry the straps loose the elasticity and are helpless in keeping your child better positioned. Secondly the plastics break down over time – so leave the car crashes – even a break-down of the seat may become the cause of an accident. And an expired car seat may not protect your child adequately in a crash and even the insurance companies will deny claim to any damage.
Crash History
Crashes damage the vehicles and change the positions of the utilities inside. This holds value if the vehicle has met an accident with a car seat installed in it.
The position of the seat, the hinges, and the straps distance all are affected by a crash, even if the crash was minor. The details are sometimes mentioned in the manuals too. Check your car seat manual to determine the how crashes affect the car seat.
After the crash – it is highly advisable that you get the kids car seat inspected by a technician and if needed then get the seat replaced.
Read the Manual
A car seat’s manual holds key information about the seat. The quality of the seat, the expiration date, approved age, weight and height limit, are some of the vital know-how mentioned in it.
It even provides detailed information about strap positioning, seats distance, tethering and other important technical queries. These are few important guidelines demonstrated via diagrams and artworks about the installation and fixing up of the seat.
Reading the manual and acting accordingly is always a wise decision, however boring you feel doing it.
In case you misplace the manual, you can contact the car seat manufacturer for a replacement.
Learn more about car seats by various training programs
A “National Child Passenger Safety Certification Training Program” is conducted by the “National Child Passenger Safety board”. The program is designed to assist caregivers in the safe transportation of children across USA. The program trains and certifies technicians and instructors working for child passenger safety.
Several other training programs are also conducted for children car safety awareness. If possible at least once you should enroll in this kind of program to know more about kid’s safety seats.
Things you need to look for AFTER you seat your child
Removed coats and all winter clothing (or any other extra clothing) before buckling?
Seat your child – Place him in the seat so he or she is sitting upright with his or her back against the back of the car seat and remove all the extra dressing materials he is wearing.Many parents think that coats and fur material will prevent the kids from a crash. But this is wrong!
All the extra clothing on your kid results in uneven strap placements. Puffed clothes are the reason for extra space between the child and the straps. In any crash the clothes will compress immediately. This means that the kid’s body will move more distance before coming to a stop resulting in more damage.
So place the kid on the seat – with thin clothes. If the winters are extreme and the climate requires warm coats then place them above the kid after buckling him up in the seat.
Related reads: What Should Baby Wear Home From Hospital in Winter?
Height of the straps
The height of the straps is a very important aspect in proper strap placement techniques. Improper height positioning leads to inconvenience to the child. In minor shocks and jerks the child can pop from the seat if the height of the strap is not properly maintained!
When you kid is rear facing then the straps should always be positioned at or below your child’s shoulders.
If he is forward facing then the straps should necessarily by positioned at or above the child’s shoulders.
Position of the chest clip
The purpose of a chest clip is d to keep the straps in position over the torso
The correct position of the clip is child’s sternum, at his nipple or armpit level. You can choose whichever is comfortable to your kid.
Mostly kids prefer the clip to be positioned at their sternum. Even if you will place it above the sternum they will drag the clip down.
How tight or lose the harness straps are
This is where most of the parents go wrong. They don’t tighten the straps and keep them lose. A slight uneasiness from the kids end because of the tightness of the straps leads to loosening of the straps.
The harness straps are meant to keep your child buckled up – so the straps are going to be tight – and your kid will not like it initially! Remember the general rule – position the harness “as snug as a hug.”
During a crash it is the harness straps that hold you child in the car seat intact. If the straps are not tight enough your child will come out of the straps and in open.
A harness strap should not allow any slack. It should be as straight as possible without any sagging.
Do the pinch test which has three methods
First Method – Pull the harness straps to a snug tightness. Now try to pinch – if you are able to pinch the harness horizontally the material need to be tightened more.
Second method – Pinch the straps vertically at the collar bone. If you can grab excess slack between your fingers and pinch it, the straps are too loose.
Third Method – If you can fit more than 2 fingers in between the straps and your child, then tighten the straps.
Remember to not over-tighten it too! The straps should not press on the child’s bone or push the child’s body into an unnatural position.
These are the steps you need to follow for your child’s safe ride. Happy Journey!
Steph is a passionate mom who co-founded Wumblers to share her parenting journey with others. She graduated from Concordia University with a masters degree in Education Technology and worked as an advisor for many years. Steph loves being a mom and wants to have more kids.
Learn more about Steph and Wumblers here.